2 Paper Rose Hair Clip

Tuesday, August 30, 2011
I made a hair clip today, here it is:
I was feeling like baking but after wandering through my kitchen and finding only the bare minimum, I kept wandering right on through the garage door out to the massive pile of boxes. From there my journey went onward and upward over the giant heaping mountain of boxes until I found the one that holds craft paper, I selected a couple sheets of purples and retreated back into the house to locate my stack of black paper, after all what would a hairdresser be without having absolutely everything in black.. I then dug up some scissors and twine, you could use hemp, I'm not sure what exactly this is that I found.. other than a tangled mess but it'll do the job just fine. Here is everything.. minus the clip that I found in my hair..
So really just twine or ribbon if you've got that just whatever you have on hand is fine, some colored paper -or in my case black.. a hair clip and scissors
I have clips similar to >THIS< all over my house so that's what I used
Cut out a little square
Round out the edges.. 
Cut it in a spiral shape.. it can be a little irregular that's fine
Start at the outside end
and curl it, try to get it as tight as you can
Hold it for a second then let it go, this is after I let it go, I'm just holding it loosely
I tied a bow around the clip end of the clip and wrapped the other end so there's no metal sticking out anywhere.
Now go out and take some pictures =]
I wasn't sure which side I wanted it on, usually I put clips/pins in the short side of my hair..
But I think I like this one better on my long side. 
Either way I was pretty happy with it. I just want to take a moment to note that I'm wearing color today, this is rare, generally the only color I wear is in my hair. But back to my craft, you can use these little paper roses for just about anything, I also thought of making a bunch and decorating a frame with them or something.. you could also make them out of things other than paper, felt would probably be fun.. ooh! Felt roses on a headband? yeah? maybe next time..

Enjoy! =]

0 Cherry Pie

Wednesday, August 17, 2011
Okay so again, its taken me forEVER to get around to blogging this even though I've had the pictures uploaded and edited for weeks now.. 
Yes I'm using pictures from the blog I did on the crust.. my apologies, however, they're great pictures and I don't care. Credit for these pictures, again, goes to James O'Hayer his website is >HERE< you should go check it out he's a GREAT photographer. 
Back to my pie, and more specifically the filling..
This recipe also came from my pie book which you can find >HERE< it was recommended to me by a friend who knows the author. 
You need 4 C cherries. Get the sour kind, if you can find fresh ones get them! If not the canned ones work fine, just note that the fresh ones will need to be pitted and that can be a chore, or so I hear, I got the canned kind, it took 2 cans, I drained the juice and dumped them into my bowl
Add 1 C sugar, yeah, I may have over done it a little. 
Put in 3 T corn starch..
Then add 3 T Amaretto, no, I didn't really measure this part. And, if you're using real cherries, take some dried cherries and soak them in the amaretto. 
Mix it all up
Spread it into a pie crust.. you can use >THIS< one, I strongly recommend it. 
I used a lattice crust..
Bake to perfection... 40mins or so @ 400F
Yes, pie is excellent, if you need more than that to be convinced you need to make one.. I don't know what to tell you. 
Oh and I'm sure you remember Candice(far right) from previous appearances on here.. check out her youTube channel >HERE<

Happy Baking!
Enjoy! =]

0 New, Better Pie Crust

Monday, August 8, 2011
 I made this pie like a week ago, technically it was still July.. that's how long it's taken me to blog this..... Anyway with all this health craze going around and my less than healthy kitchen habits I decided it was time to put in some effort. It turns out that gluten doesn't have to develop, its still there but you can make it n ot develop.. Here is my finished pie(s):
Beautiful, is it not? Honestly I didn't get to taste the cherry pie, which I'm okay with because I also made an apple pie.. or two.. with this crust and I can assure you it is quite possibly the best pie crust I have ever eaten. Also, you may note that the above photo is professionally done.. you can thank James O'Hayer for that his site is >HERE< annnd.. Here is what all is in it:
So.. you may have heard about these wonderful things called mason jars? yes? Okay so they are my new angle on the organization home-front, that and I needed something air-tight because I don't get around to baking as often as I'd like to. The big gallon size jar has flour in it, the half gallon is sugar. I forgot to throw the baking powder into the picture, you'll have to just pretend it's there, it doesn't have a mason jar yet. 
Start with a cup of flour in the mixer (I did 2 because I was making more than one pie) add 1/2 t sugar (I did a full t)
Then add 1/4 t Baking powder (again I did 1/2)
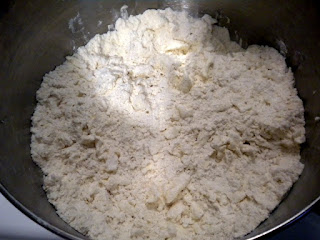
Shake in some salt if you're using unsalted butter (1/4 t) and mix it all together
You'll need 5 T butter (I used 10)
Cut it up in little pieces (make sure its super cold for this part you may even want to throw it in the freezer for a few minutes)
Mix the chunks in
Okay for real this time..
Thats better. If you don't have a pastry cutter you'll have to get creative and improvise
Like I did... No, I don't have a pastry cutter, don't worry I'm on that
In a bowl/cup mix 3-5 T ice water with a squirt of lemon juice, slowly add it in a T at a time while mixing
Your mess will be pretty dry looking, don't worry about that. Too much water will make it tough.
Time to get dirty
Don't be afraid to really get in there.. you knead to LOL! Sorry, I had to. 
Once you get it all figured out and it looks like a mass of dough rather than a crumbly mess (which it will, have patience) get it wrapped up and throw it into the fridge for an hour or so. 
I used double remember, because I planned on making two double crust pies, so you may not need to rip your ball in half like I did... but you will need to roll it out so flour up your rolling pin and get going, heads up its a bit of a pain to work with its very.. elasticky? That's not a word but its fitting. Its a lot like bread dough rather than being like cookie dough. 
Lay it into your pie plate
Spread your filling of choice in it (I'll blog the cherry filling later)
I rolled out the other half of the ball (I made two balls, one for this pie and another for the double crust apple and had enough for a second smaller one crust apple pie)
I went with a lattice crust because I feel like you need it with a bright colored filling
Brush with egg wash
Egg wash is basically just an egg mixed up with some water, all it really does is make your crust brown a lot prettier
Bake at 400F for 40mins and voila! Yummy goodness. 
We had a photo shoot with these pies, I may have mentioned that already
They were pretty awesome I'm not going to lie
I hope you all love this AMAZING crust as much as we did, and if nothing else you need to try it because its the best ever.. and here is why:
 **The acid in lemon juice prevents gluten from developing. Baking powder gives the crust a little lift, making it more flaky, and just a little bit of sugar makes the crust brown nicely. Too much sugar will make your crust tough. 
^^That came directly from the book I got the recipe out of, the book can be found >HERE<

Happy Baking! 
Enjoy! =]